
A beginner-friendly guide to preparing your machine learning project
From Python installation to GitHub repos — everything you need before writing a single line of ML code.

Dear reader,
I have been teaching AI and ML at a technical university in Germany for the last four semesters, and I mentor professionals who want to move into ML and data science. Across all these experiences, I’ve noticed a common pattern:
Many beginners jump straight into coding their first ML model… only to get stuck in package conflicts, missing dependencies, or messy project structures.
The truth is: a well-prepared setup saves you hours of frustration later. Think of it as sharpening your tools before building.
This guide is your Step 0: the essential setup before any ML or Data Science project.
Starting September 5, 2025, I’m launching a free 7-Day ML Project series on LinkedIn where we’ll build a complete end-to-end ML project together. This newsletter prepares you for that journey. (More details at the end.)
Step 1: Install Python (the right version)
Not every Python version plays well with ML frameworks. For example:
Python 3.12 doesn’t support TensorFlow yet.
Python 3.10 is the safest choice today — compatible with almost everything.
Should I use pip or conda?
This is one of the first questions beginners face. Both tools are used to install and manage Python packages, but they work a little differently:
pip → The default Python package manager. Works across all operating systems and is lightweight.
conda → Comes with Anaconda/Miniconda. It manages both Python and non-Python dependencies (e.g., C libraries) and is often preferred for complex data/ML workflows.
Think of it like choosing a food delivery app — UberEats, Lieferando, Swiggy, Zomato — they all deliver food, just with slightly different processes.
If you’re on macOS, you might also use Homebrew to install Python.
For beginners, I recommend starting with pip because it’s simple and universally supported.
Here are the official installation guides if you want to explore:
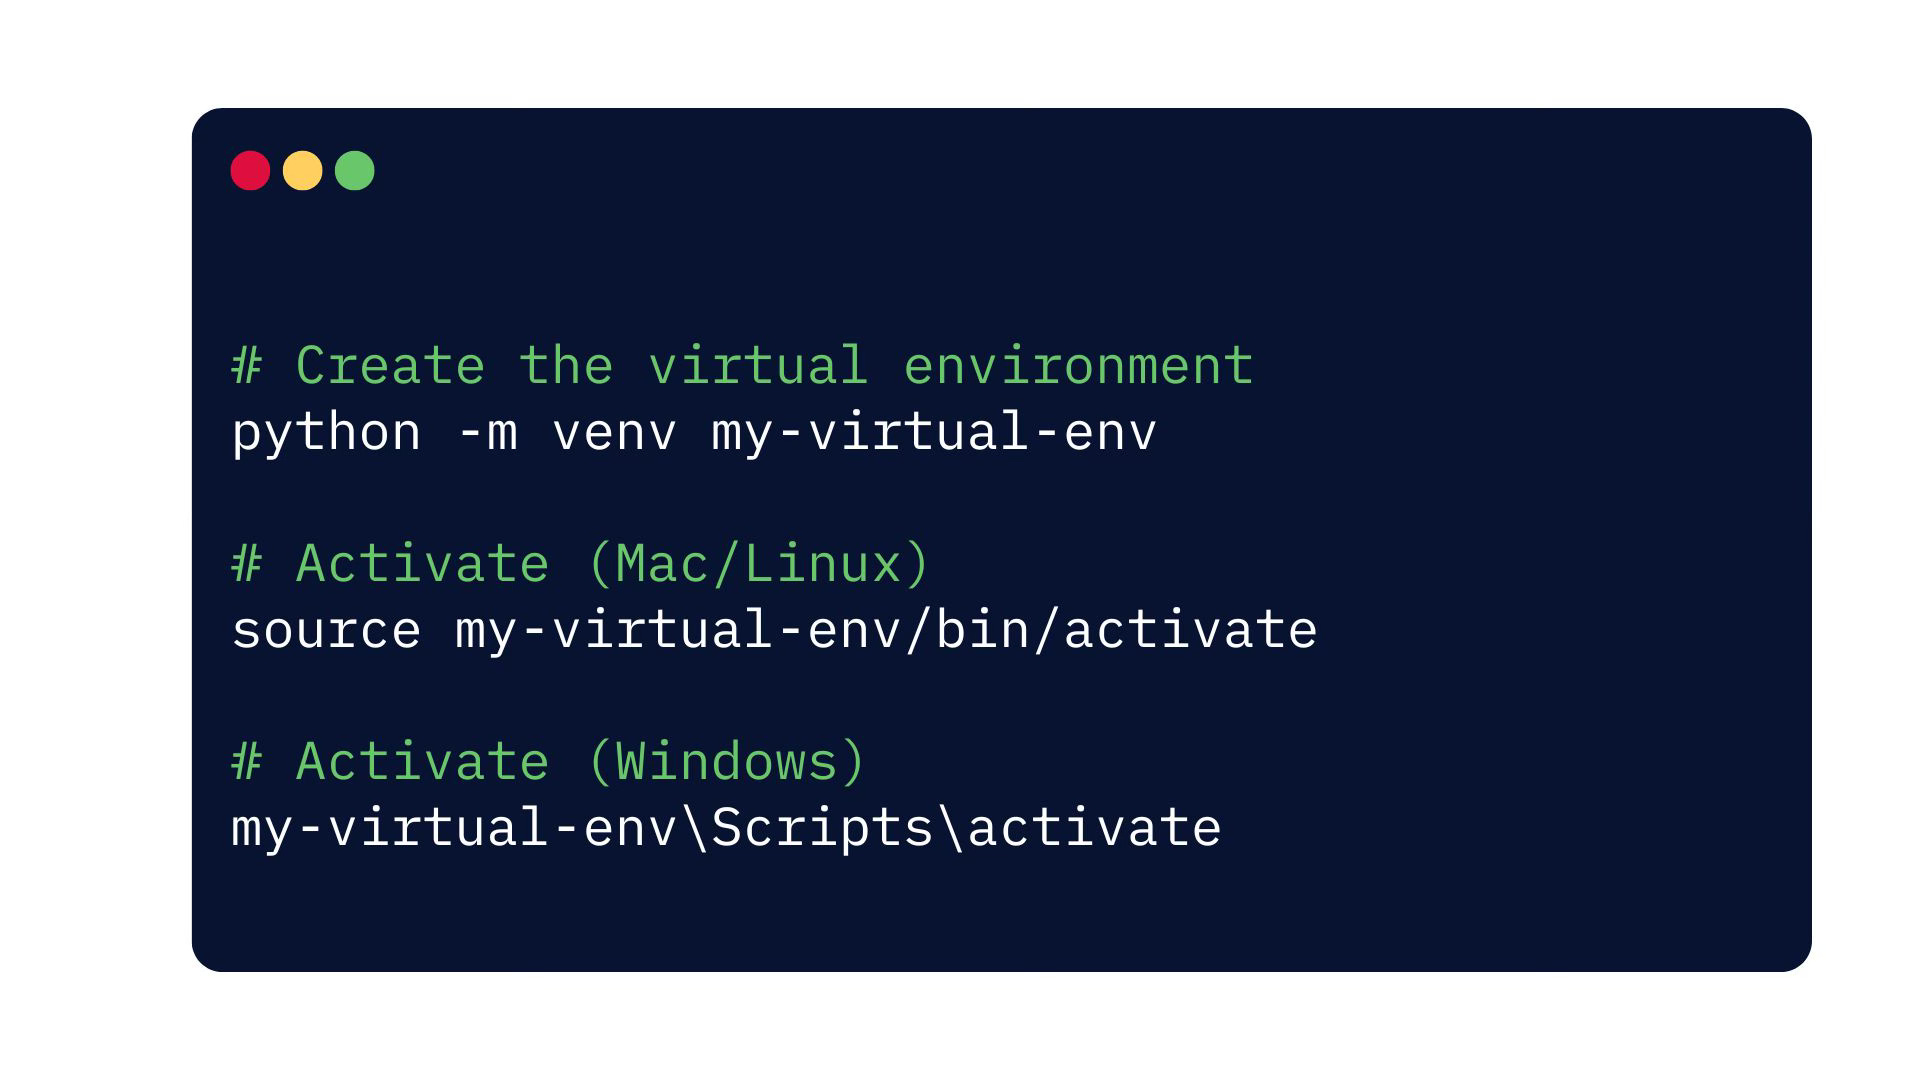
Step 2: Create a virtual enviroment
Virtual environments act like clean workspaces for each project. Instead of installing every library globally (and risking version conflicts), you create a dedicated environment that holds only the dependencies you need. This ensures that upgrading TensorFlow for one project doesn’t accidentally break another. It’s a simple habit that makes your workflow more reliable and your projects easier to share or reproduce.
You can give any name for the virtual envirnment. Usually, I write the name with the python version to indicate that why this envornment is created or using. For example, venv-python310 or venv-python312-noTF
You always need to install Python first, because virtual environments are created inside Python. Without Python, you can’t create a venv.

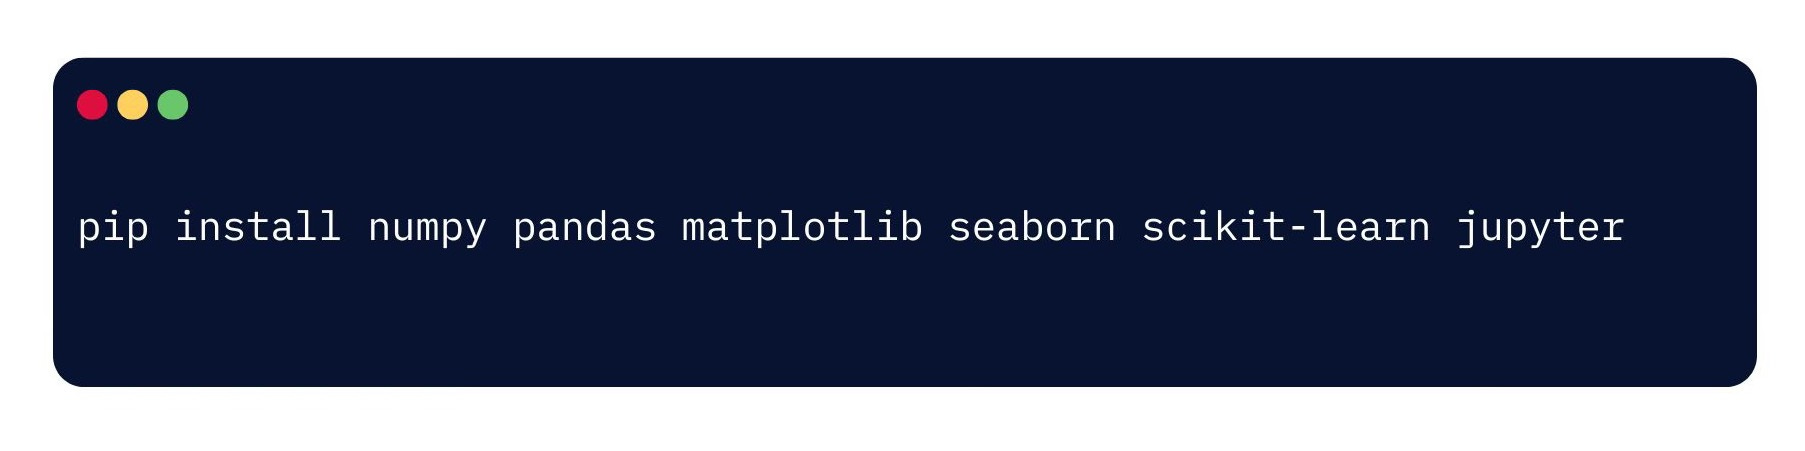
Step 3: Install core ML libraries
Before starting a project, it helps to set up the core libraries you’ll almost always need. You can always add more later, but a strong base saves time. At minimum, install:
pandas → data handling
matplotlib, seaborn → visualization
numpy, scipy → numerical and scientific computing
scikit-learn → machine learning basics
If you prefer working in notebooks, add jupyter as well. This toolkit covers most entry-level ML and data science workflows, and you can layer in additional libraries as your project grows.
Optional but useful:
xgboost, lightgbm → Gradient boosting libraries.
tensorflow, torch → Deep learning frameworks.
notebook, jupyterlab → Interactive coding environments.
Step 4: Git and Github for version control
When you’re serious about learning projects systematically, Git is non-negotiable. Renaming files as final_code_v1.py or insurance_predictor_v1.py is not version control, it’s chaos. Git allows you to track changes, roll back mistakes, and collaborate like a professional. If your goal is to showcase industry-ready projects, setting up proper version control from the start is essential.
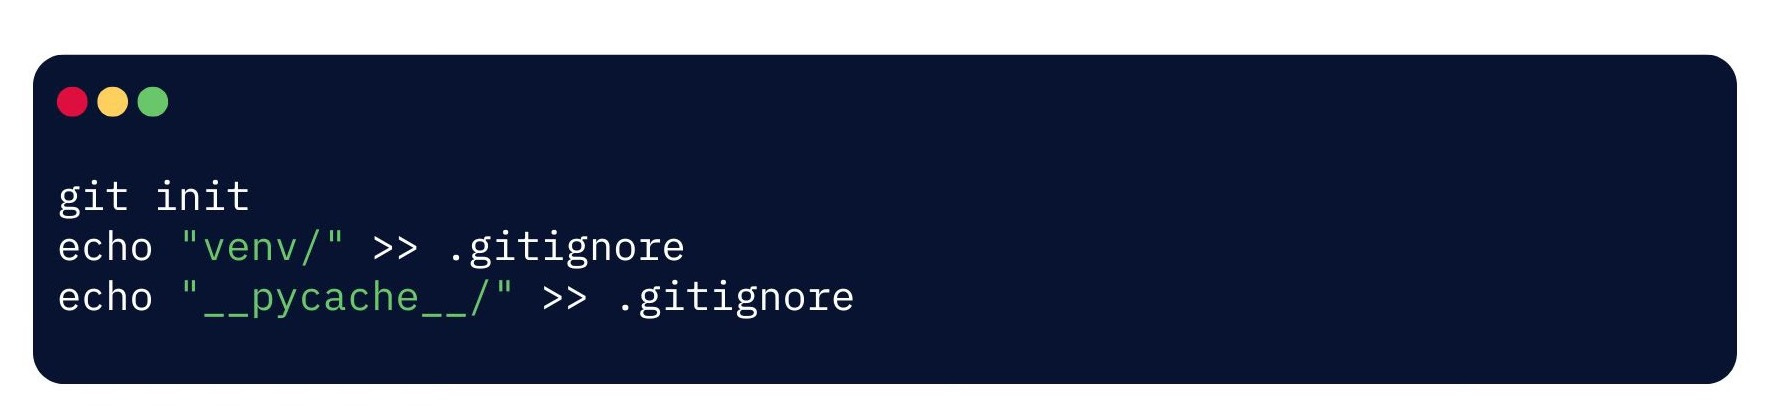
Explanation of the code:
Initialize Git inside your project folder: git init
Create a .gitignore file to avoid pushing unnecessary files:
venv/__pycache__/Create a README.md file describing your project:

Push to github:


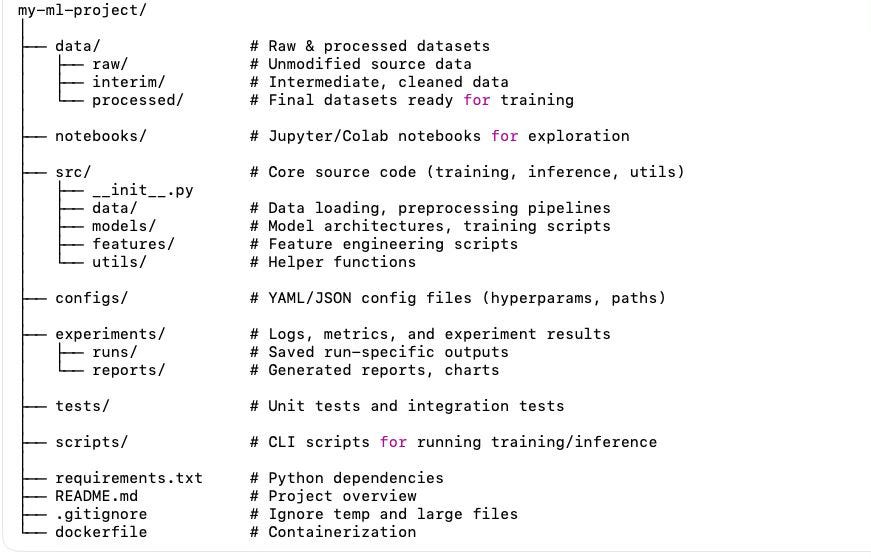
Step 5: Organise your project folder structure
A clean repo signals professionalism. Here’s a simple structure to follow:
Export dependencies with:
pip freeze > requirements.txt
The way you set up your environment says a lot about how you work. Clean repos, reproducible environments, and proper version control aren’t “nice-to-haves”, they are what separate beginners from professionals. If you want to be taken seriously in ML and data science, your foundation matters just as much as the models you build.
That’s why I’m inviting you to join the 7-Day ML Roadmap on LinkedIn, starting September 5, 2025. It’s completely free. Over the course of one week, we’ll build a full end-to-end machine learning project — from raw idea → working model → Streamlit app → portfolio showcase. This newsletter was Step 0: preparing your tools so you’re ready to jump in.
If you’ve been struggling to turn your knowledge into proof that gets noticed, this is your chance. Follow along, build with me, and by the end you’ll have a project you can show recruiters — not just a certificate.
See you inside,
Dr. Aleena Baby
Academia to Industry — Proof, not promises
